How to Set Up a Line Array Speaker System for Outdoor Events
| KEY FACTS A line array delivers more consistent volume across a large coverage area than conventional point-source speakers by controlling vertical dispersion. Proper array curvature (splay angle) is the most critical setup variable. Too little splay creates hot spots. Too much creates coverage gaps. Outdoor line arrays require more subwoofer support than indoor systems because no room reflections contribute to bass perception. This guide covers array assembly, positioning, angle calculation, subwoofer placement, and system optimisation for outdoor events. The principles apply to both flown and ground-stacked line array configurations. |
The first time you set up a line array system for an outdoor event, it can feel like a different discipline from the live sound you already know. The physics are different. The tools are different. And the consequences of getting the angle calculations wrong are immediate and obvious to the entire audience.
I have set up line array systems for outdoor concerts and festivals of various sizes, from compact six-element arrays for a few hundred people to larger touring configurations. The fundamental principles remain consistent regardless of scale. This guide gives you those principles in practical terms, with enough detail to set up your first outdoor line array correctly and enough depth to refine your approach on subsequent events.
Why Line Arrays Work Differently From Point-Source Speakers
A conventional point-source speaker fires sound in all directions within its coverage pattern. The volume level drops by 6 dB every time you double the distance from the speaker (the inverse square law). This means the people at the front of the audience hear significantly more volume than the people at the back, and getting consistent coverage across a large outdoor crowd requires either a lot of speakers or very high volume levels.
A properly configured line array behaves differently. When multiple speaker elements are correctly arrayed and driven in phase with each other, they create a cylindrical wave rather than a spherical one. A cylindrical wave drops by only 3 dB for every doubling of distance, meaning the back of the audience is much closer in level to the front than it would be with a point-source speaker system. This is why line arrays are the dominant system choice for medium to large outdoor events.
The key word in that description is ‘properly configured.’ A line array that is assembled with incorrect splay angles, powered incorrectly, or positioned poorly will not behave like a line array. It will behave like a stack of individual speakers with significant comb filtering and coverage problems. Configuration is everything.
Understanding Splay Angles and Array Curvature
The splay angle is the angle between adjacent line array elements. Getting this angle right is the most important technical decision in line array setup. The splay angle determines where the sound goes vertically, how far it throws, and how evenly it covers the audience from front to back.
How Splay Angles Work
When line array elements are stacked with zero splay (all parallel, pointing the same direction), the array creates a very narrow, long-throw beam that concentrates energy at a distant point. This configuration works for very large venues where throw distance is the primary requirement, but it creates very uneven coverage in the near field.
As you increase the splay angle between elements (opening the array into a J-shape or arc), you spread the coverage more evenly between the near and far audience areas. More splay at the bottom of the array (closest to the stage) covers the near audience, while less or no splay at the top covers the far audience.
The J-array configuration is the most common approach for outdoor events. The top elements have little or no splay between them to maximise throw distance. The bottom elements have progressively larger splay angles to cover the near audience without aiming energy at the ground.
Practical Splay Angle Starting Points
Most line array manufacturers provide rigging software (like d&b Soundscape, L-Acoustics Soundvision, or the simpler browser-based tools from brands like dB Technologies and FBT) that calculates optimal splay angles based on your array height, audience depth, and system configuration. Use this software. It saves hours of trial and error.
If you do not have access to manufacturer software, here are starting point splay angles for a basic outdoor event:
- Top three to four elements (upper array, long throw): 0 to 1 degree splay between elements
- Middle elements (mid throw): 1 to 3 degrees splay between elements
- Bottom one to two elements (short throw, near fill): 3 to 7 degrees splay between elements
These are starting points only. The correct angles for your specific system depend on the number of elements, the individual element’s vertical coverage angle, and the throw distance to the back of your audience area.
Positioning the Array: Height, Aim, and Location
Array Height
The array should be rigged or ground-stacked at a height that allows the bottom element to clear the heads of the front audience area and the top of the array to have a sightline to the back of the audience area. For an outdoor event without permanent rigging points, this typically means the bottom of the array is at 3.5 to 4.5 metres above the ground, depending on the array depth and the expected audience density near the stage.
Lower is generally better for line array performance because the shorter the distance from the speaker to the listener, the less air loss affects high frequencies. However, the array must be high enough that the front audience is in the coverage zone rather than under the array pointing over their heads.
Array Aim
The array should be aimed so that the last element covers the back of your audience area. Calculate this by looking at the angle from the bottom of the array to the back of the audience, accounting for array height and audience distance. This becomes the downward tilt of the entire array.
For an outdoor event where the array is rigged at 4 metres height and the back of the audience is 40 metres away, the angle from the array to the back of the audience is approximately 6 degrees below horizontal. The array should be tilted to this angle, adjusted slightly based on the specific element coverage patterns.
Left and Right Array Spacing
In a standard left-right line array configuration, each array covers approximately half the audience from the centre out to the side. Arrays should be positioned no wider than the stage width to avoid creating excessive comb filtering in the centre of the audience where both arrays’ coverage zones overlap.
For outdoor events with wide stages, consider delaying the left and right arrays slightly relative to each other to improve centre coverage coherence. The delay time is calculated from the physical distance between the arrays.
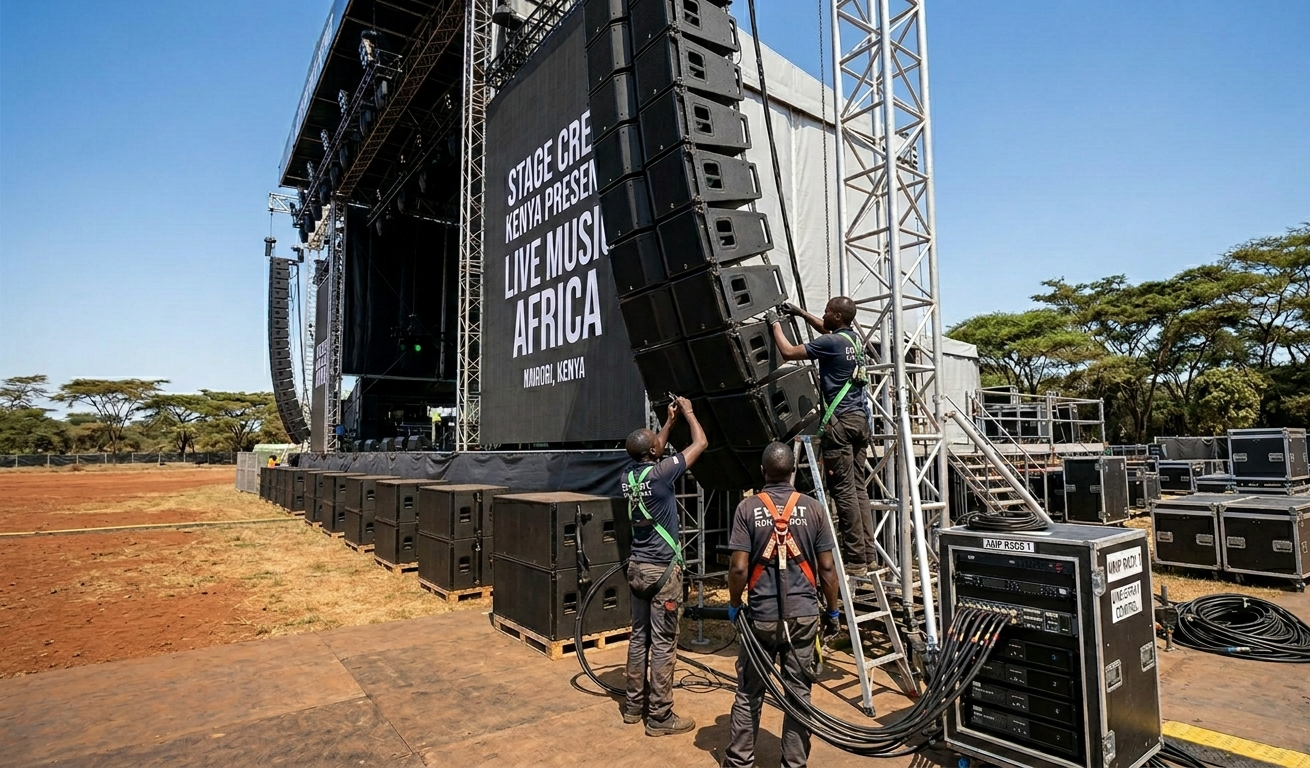
Ground-Stacked vs Flown Arrays
Flown arrays are superior for audience coverage in almost every situation because they can be aimed optimally without physical obstacles blocking the sound path to the audience. However, flying a line array requires certified rigging points (typically structural roof or truss), qualified riggers, and load calculations. For permanent venues and large touring productions, flying is standard.
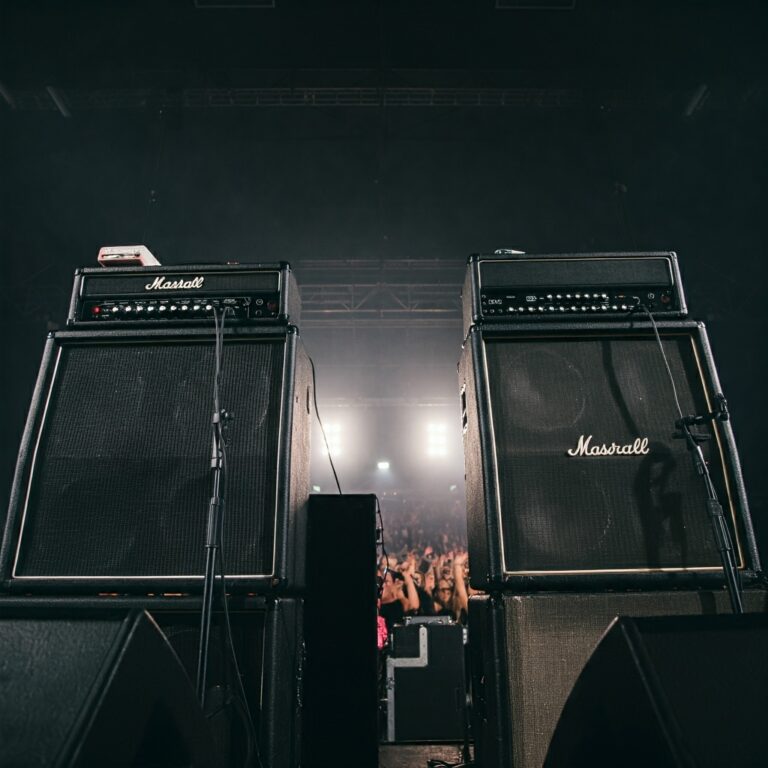
Ground-stacked arrays are used when flying is not possible, typically at outdoor events without structural overhead rigging. A ground stack places the array on top of subwoofer cabinets on the ground, with the array elevated to 3 to 4 metres above ground level by the sub stack height.
Ground stacking has one major practical limitation: the array is aimed slightly upward relative to a flown array at the same height, which can cause the front audience area (who are close and below the array) to receive poor coverage while the far audience receives better coverage. Compensate by increasing the splay on the lower elements more aggressively and considering front-fill speakers for the area directly in front of the stage.
Subwoofer Placement for Outdoor Line Arrays
Outdoor events have no floor, ceiling, or walls to provide low-frequency reinforcement. This means outdoor systems require approximately four times the subwoofer power of comparable indoor systems to achieve the same perceived bass level at the same SPL. Never underestimate sub requirements for outdoor events.
End-Fire Subwoofer Arrays
The standard approach of placing all subwoofers in a single cluster in front of the stage creates an omnidirectional radiation pattern. This sends significant bass energy toward the stage and the performers, which increases stage volume, can cause feedback with microphones, and wastes energy in a direction where it is not needed.
An end-fire subwoofer array addresses this by spacing subwoofers in a row from front to back and applying time delay to the rear units. This configuration reinforces bass forward toward the audience and cancels it toward the stage, typically achieving 15 to 20 dB of rejection toward the stage compared to a conventional cluster. For outdoor events, this reduction in stage bass is a significant benefit.
The delay time for each sub in an end-fire array depends on the physical spacing between units. A common starting configuration uses subwoofers spaced one quarter wavelength of the target frequency apart (approximately 1.1 metres for a 75 Hz target frequency) with delay applied to each successive rear unit equal to the sound travel time across that spacing.
Cardioid Subwoofer Arrays
A cardioid subwoofer configuration is another approach to reducing rear bass radiation. It involves combining forward-facing and rear-facing subwoofers with specific delay and polarity settings to create a front-focused, cardioid bass pattern. Most professional line array systems and their associated processor software include cardioid subwoofer presets that simplify this configuration significantly.
Signal Processing and System Optimisation
Crossover and Delay Settings
A line array system needs a system processor (either a dedicated unit or the DSP built into a digital mixer) to apply the following:
- Crossover: Setting the frequency at which the system hands off from the subwoofers to the full-range array elements. Typically 80 to 120 Hz for most line array systems.
- Time alignment: Applying delay to the subwoofers to time-align them with the full-range array at the listener position. Because the full-range elements are higher (either flown or on a tall ground stack), they are further from the audience at the listening position. The subs, being lower, are closer. Delay on the subs compensates for this difference.
- Array element amplifier levels: In a powered line array system, each amplifier module may need slightly different output levels applied to the elements it drives, with the upper elements (covering more distance) driven harder than the lower elements (covering the near audience). This is called amplitude shading.
Equalisation for Outdoor Use
Outdoor events do not have room modes, which means the bass response at the listening position is much smoother than indoors. However, outdoor use introduces other EQ considerations: high-frequency air absorption, where high frequencies (above 8 to 10 kHz) attenuate more rapidly with distance through humid outdoor air, requires a gentle HF boost on the main array output, typically 2 to 4 dB above 10 kHz, to compensate at the back of the audience area.
Wind can also affect the apparent level and directional character of the array. A strong wind blowing toward the stage can significantly reduce the perceived volume at the back of the audience. There is no practical EQ solution for this, but awareness of wind direction when positioning the array can help.
Pre-Show Testing Process
- Assemble and connect the array following the manufacturer’s rigging guide. Verify all connections are secure and all power and signal cables are run safely.
- Load the manufacturer’s preset for your array configuration into the system processor. This gives you a validated starting point for crossover frequencies, delay settings, and limiting parameters.
- Play pink noise through the full system at a safe level. Walk the entire audience area from front to back and from left to right, listening for coverage consistency. Note any areas where the level drops significantly or where certain frequencies are emphasized or reduced.
- Adjust splay angles based on what you hear. If the front area is significantly louder than the back, increase the splay on the lower elements to distribute more energy toward the near audience. If the back is noticeably louder than the front, reduce splay on the lower elements.
- Check the subwoofer time alignment. Stand at a position roughly one quarter of the audience depth from the front. Listen for the bass to feel full and integrated with the full-range sound. If the bass sounds disconnected or ‘behind’ the sound, the sub delay needs adjustment.
- Ring out the system as described in the feedback prevention guide. Outdoor events with moving air and changing ambient noise levels can present different feedback challenges than indoor venues.
Frequently Asked Questions
How many line array elements do I need for an outdoor event?
This depends on the audience size, the throw distance, and the SPL requirements of the event. As a rough guide, a two to four element compact line array (like a dB Technologies DVA T4 or similar) covers audiences of up to 300 people at moderate SPL. A four to eight element mid-size array covers 300 to 1,000 people. Larger events require professional system design and calculation software to specify correctly.
Do I need amplifiers for a line array system?
Modern line array systems are typically active (self-powered), with amplifiers and processors built into each cabinet or into an external amplifier rack that is part of the system. Passive line array systems requiring external amplification are less common in current products. Check whether the system you are working with is active or passive and ensure appropriate amplification is provided if required.
Why does my line array system have uneven coverage despite correct splay angles?
Several potential causes. The most common is inconsistent amplification between elements, where some elements are driven at different levels due to amplifier level settings or signal routing errors. Check that all elements are driven at consistent levels before adjusting splay. Another common cause is an element that is damaged or not functioning, creating a gap in the coverage pattern. Test each element individually to verify all are producing sound.
Can I use a line array system for monitoring on stage?
Line array systems are not appropriate for stage monitoring. Their long-throw, narrow vertical dispersion characteristics are designed for audience coverage from height. Stage monitors require wide, even coverage of a small area close to the performer. Use dedicated stage monitor wedges or in-ear monitor systems for this purpose.