How to Bridge a Power Amplifier: Step-by-Step Guide With Real Examples
| KEY FACTSBridging combines both channels of a stereo amplifier into a single more powerful mono output.Bridged mode roughly doubles the available power compared to a single channel at the same impedance.The most important rule of bridging: the minimum speaker impedance doubles. An amp rated for 4 ohms per channel can only drive 8 ohms when bridged.Bridging is most commonly used to drive subwoofers with high power requirements from a single amplifier.Incorrect bridging can damage both the amplifier and the connected speakers. This guide walks through the process correctly. |
Bridging is one of those amplifier functions that is frequently talked about but frequently done incorrectly. I have seen engineers bridge amplifiers into speaker loads that the amplifier cannot handle in that configuration, and I have seen church sound systems where the amplifier has been running bridged into a load that stresses it every single Sunday for months. Understanding exactly what bridging does, when to use it, and most importantly, when not to use it, will prevent you from making those same mistakes.
This guide explains the physics of bridging in plain language, gives you a clear step-by-step process for setting up a bridged amplifier correctly, and covers the most common mistakes with specific examples of what goes wrong and why.
What Does Bridging a Power Amplifier Actually Do?
A stereo power amplifier has two independent amplifier channels. Each channel takes an input signal and amplifies it to drive a speaker. In normal stereo operation, Channel A drives one speaker and Channel B drives another speaker, and the two channels are completely independent of each other.
When you bridge an amplifier, the two channels are reconfigured to work together as a single amplifier. Channel A amplifies the signal in the normal phase. Channel B amplifies the same signal but inverted by 180 degrees. The speaker is then connected across the two outputs instead of from one output to ground. The speaker sees the sum of both channels, which is approximately double the voltage swing of a single channel.
Because power is proportional to the square of voltage, doubling the voltage across the speaker load results in approximately four times the power into a given load. In practice, taking into account the impedance doubling requirement and real-world power supply limitations, bridging typically delivers between 2x and 3.5x the single-channel power rather than the theoretical 4x maximum.
The Critical Rule You Must Understand Before Bridging
This is the single most important thing to know about bridging, and it is the thing that causes the most damage when it is ignored: when you bridge an amplifier, the minimum speaker impedance doubles.
Here is why. In bridged mode, each channel sees half the speaker impedance. If you connect an 8-ohm speaker in bridged mode, Channel A sees 4 ohms and Channel B sees 4 ohms. If your amplifier is rated for a minimum of 4 ohms per channel in stereo mode, connecting an 8-ohm speaker in bridged mode is right at the limit.
If you connect a 4-ohm speaker in bridged mode to an amplifier rated for 4 ohms minimum in stereo, each channel is now seeing 2 ohms. This will cause the amplifier to overheat, trigger its protection circuit repeatedly, and potentially fail permanently. Many engineers make exactly this mistake.
The rule is simple. Take your amplifier’s rated minimum impedance in stereo mode and double it. That is the minimum speaker impedance you can safely connect in bridged mode.
| Stereo minimum impedance | Bridged minimum impedance | Example: 8 ohm speaker in bridged? |
| 2 ohms per channel | 4 ohms bridged | Safe |
| 4 ohms per channel | 8 ohms bridged | Safe |
| 8 ohms per channel | 16 ohms bridged | Most passive speakers too low |
When Should You Bridge an Amplifier?
Bridging is most commonly and most appropriately used in these situations:
- Driving a high-power passive subwoofer. Subwoofers require more power than full-range speakers, and bridging an amplifier to drive a single high-power sub cabinet is a very common and appropriate use. A single 18-inch subwoofer rated for 1,200 watts RMS is a perfect candidate for a bridged amplifier delivering 1,400 to 2,000 watts into an 8-ohm load.
- Centre fill or delay speaker applications. A centre fill speaker or a single delay speaker serving the back of a venue can be driven in bridged mono from a single amplifier, using the second channel of the same amplifier for a different purpose such as a monitor feed.
- Maximising the power available from an existing amplifier without purchasing a new one. If you have a stereo amplifier with more power per channel than you need for your full-range speakers and you need additional power for a subwoofer, bridging that amplifier for subwoofer duty is an economical solution.
When You Should NOT Bridge an Amplifier
- When the speaker impedance is too low for bridged operation. As described above, never bridge into a load below the amplifier’s bridged minimum impedance. Check the manual specifically for the bridged minimum, not just the stereo minimum.
- When the amplifier does not support bridging. Not all amplifiers support bridged operation. The manual will state clearly whether bridging is supported and how to configure it. Never attempt to bridge an amplifier that is not explicitly designed for it by connecting speakers directly across the two output terminals without the manufacturer’s bridging configuration.
- When you need stereo output. Bridging produces a mono output from two channels. If you need true stereo reproduction, for example left and right speakers in a stereo system, bridging is not appropriate.
- When thermal management is already a concern. Bridging increases the power demand on the amplifier’s power supply and output stage significantly. An amplifier that already runs hot in stereo operation will run even hotter in bridged mode. Only bridge in well-ventilated conditions.
Step-by-Step: How to Bridge Your Amplifier Correctly
Step 1: Read the Manual
Every amplifier implements bridging differently. Some use a physical switch on the rear panel labeled bridge or mono. Others use a combination of input routing and a mode switch. Some require specific input connections. Read the manual for your specific amplifier before attempting anything. The general principles in this guide are universal, but the specific implementation is model-dependent.
Step 2: Check the Bridged Minimum Impedance
Find the specification in your manual that states the minimum load impedance in bridged mono mode. Write this down. Confirm that the speaker or speakers you intend to connect in bridged mode present an impedance at or above this minimum. If you are connecting multiple speakers in parallel in bridged mode, calculate the combined impedance using the parallel impedance formula and verify that it is above the minimum.
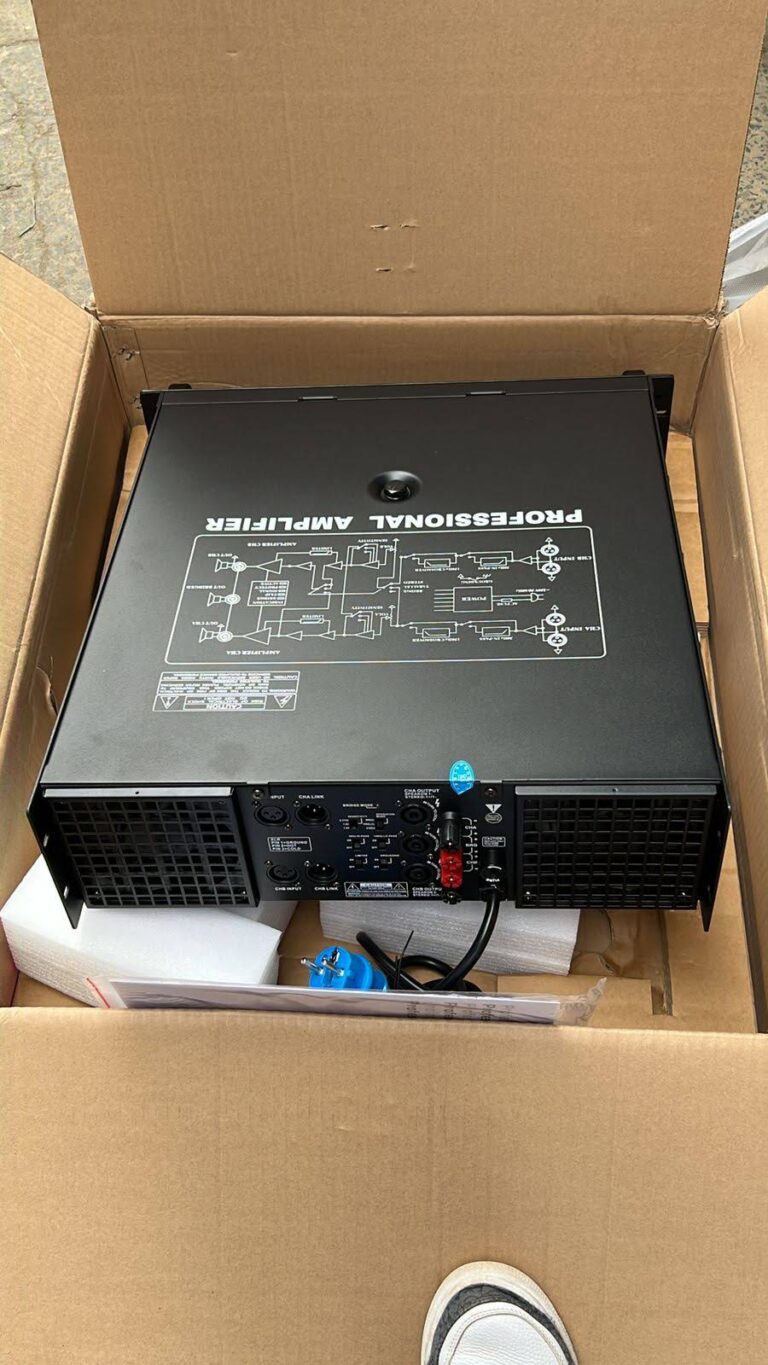
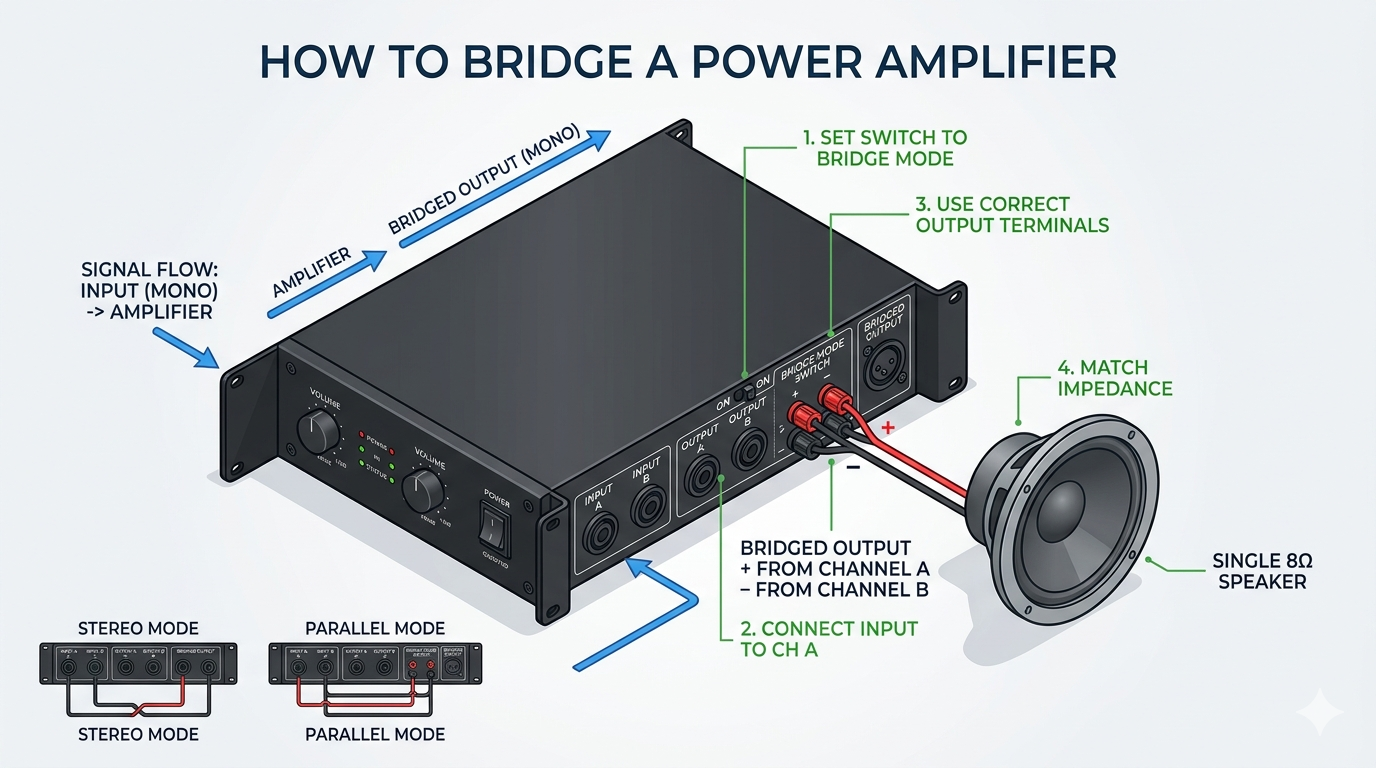
Step 3: Set the Bridge Mode Switch
On most amplifiers with a physical bridge switch, set this switch to the bridge or mono position. This typically routes the same signal to both channels internally, with the phase inversion applied automatically to Channel B. On amplifiers without a physical switch, consult the manual for the required input wiring configuration.
Input routing in bridged mode: On most amplifiers, only Channel A’s input is used in bridged mode. The signal from your mixer is connected to Channel A’s input. Channel B’s input may be connected to Channel A’s output or may be routed internally, depending on the amplifier design. Do not connect a separate signal to Channel B’s input in bridged mode unless the manual specifically instructs you to do so.
Step 4: Connect the Speaker Correctly
This is where many engineers make wiring errors. In bridged mode, the speaker connects across the positive output terminal of Channel A and the positive output terminal of Channel B. Do not use either channel’s negative terminal as part of the bridged speaker connection. The speaker essentially spans across the two positive outputs of the two channels.
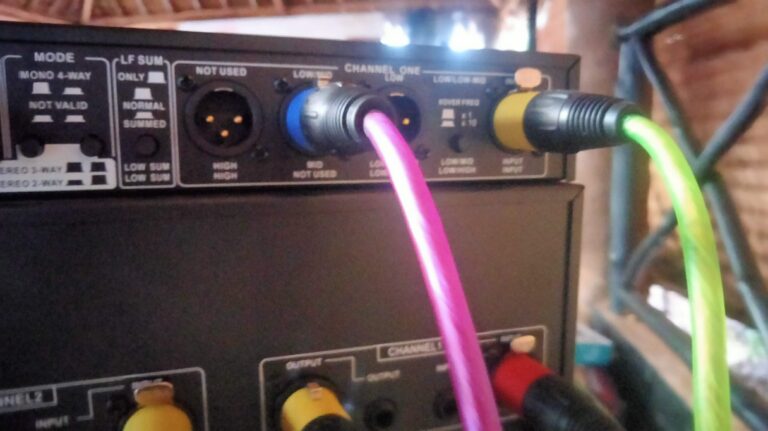
On amplifiers with Speakon connectors, the bridged output is typically taken from Channel A’s Speakon connector using pins 1+ and 2+ (rather than the normal 1+ and 1-). Check your amplifier’s manual for the correct Speakon pin assignment in bridged mode, as this varies between manufacturers.
On amplifiers with binding posts, connect the speaker’s positive terminal to Channel A’s positive binding post and the speaker’s negative terminal to Channel B’s positive binding post. Do not connect to any negative (black) binding post in bridged mode.
Step 5: Set the Input Sensitivity
In bridged mode, the amplifier’s gain is doubled along with the power output. This means the amplifier is more sensitive to the input signal level. You may need to reduce the input sensitivity setting on the amplifier compared to your stereo configuration, or reduce the output level from your mixer slightly to avoid clipping.
Set the amplifier’s level control for Channel A. This now controls the bridged output level. Start with the level set conservatively and increase it gradually while monitoring the clip indicator.
Step 6: Test Before Use
Before connecting the amplifier to your full speaker system for a live event, test the bridged configuration with a low-level signal and verify that the amplifier is operating cleanly. Check for any unexpected behaviour including clip indicators activating at low levels (which could indicate incorrect wiring), unusual heat generation, or protection circuit activation.
Real World Example: Bridging for a Subwoofer System
Let me walk through a real configuration to make this concrete. You have a Crown XLi 3500 and a single 18-inch passive subwoofer cabinet rated at 1,200 watts RMS at 8 ohms. You want to drive the subwoofer in bridged mono.
Step 1: The Crown XLi 3500 is rated for 4 ohms minimum in stereo mode. In bridged mode, the minimum impedance is 8 ohms. Your 8-ohm subwoofer is right at the minimum, which is acceptable but means you should ensure excellent ventilation.
Step 2: The XLi 3500 delivers 2,700 watts bridged into 8 ohms. Your subwoofer is rated for 1,200 watts RMS. You have more amplifier power than speaker power handling, which gives you headroom. Set the amplifier’s input sensitivity so the clip light barely flickers on the loudest bass peaks. Do not drive the amplifier to full output.
Step 3: Set the bridge switch to the bridge position on the rear panel.
Step 4: Connect the subwoofer using a Speakon cable wired 1+ to 2+ from the Channel A Speakon output. Verify this wiring in the Crown XLi 3500 manual.
Step 5: Use Channel A’s input from your mixer’s subwoofer output or bass management output. Set the low-pass filter on your mixer or crossover to route only bass frequencies to this amplifier.
Step 6: Test at moderate level and verify the amplifier is running cleanly before the show.
Frequently Asked Questions
Does bridging an amplifier improve sound quality?
Bridging increases power output but does not inherently improve sound quality. In fact, some engineers find that a well-matched stereo amplifier with adequate power per channel sounds cleaner than the same amplifier pushed harder in bridged mode. Use bridging when you genuinely need more power, not as a general way to improve the amplifier’s performance.
Can I bridge any stereo amplifier?
No. Bridging requires the amplifier to be specifically designed to support it. The manufacturer’s specifications will state clearly whether bridged mono operation is supported. Attempting to create a bridged configuration on an amplifier not designed for it by connecting speakers directly across the two output terminals can cause serious damage to the amplifier and potentially the speakers.
Why does my amplifier get much hotter in bridged mode?
In bridged mode, the amplifier is delivering significantly more power than in stereo mode. More power means more heat generated in the output stage. This is entirely normal. Ensure your rack has adequate ventilation with space above and below the amplifier, and monitor the amplifier’s temperature during the first few uses in bridged configuration. If thermal protection is triggering, improve ventilation or reconsider whether bridging is appropriate for your application and speaker impedance.
Can I bridge a Class D amplifier?
Many Class D amplifiers support bridged operation and it is specified in their manuals in the same way as for Class AB amplifiers. The same rules apply: check the bridged minimum impedance, use the correct wiring, and test before relying on the configuration in a live situation.
What happens if I connect a 4-ohm speaker in bridged mode to an amp rated 4 ohms minimum in stereo?
Each channel of the amplifier now sees 2 ohms. The amplifier will attempt to deliver current into this load, generating enormous heat in the output stage. The thermal protection circuit will activate and shut the amplifier down repeatedly. In the worst case, if the protection circuit does not respond fast enough, output transistors can be permanently damaged. Never operate an amplifier below its rated minimum impedance in any configuration.